Calisthenics For Beginners Starts Here (No Pull-Up Required)
The 8 best calisthenics exercises for beginners, with easier and harder versions of each, helpful form tips and a simple 4-week plan you can do at home.
March 6, 2020 - Updated November 4, 2026
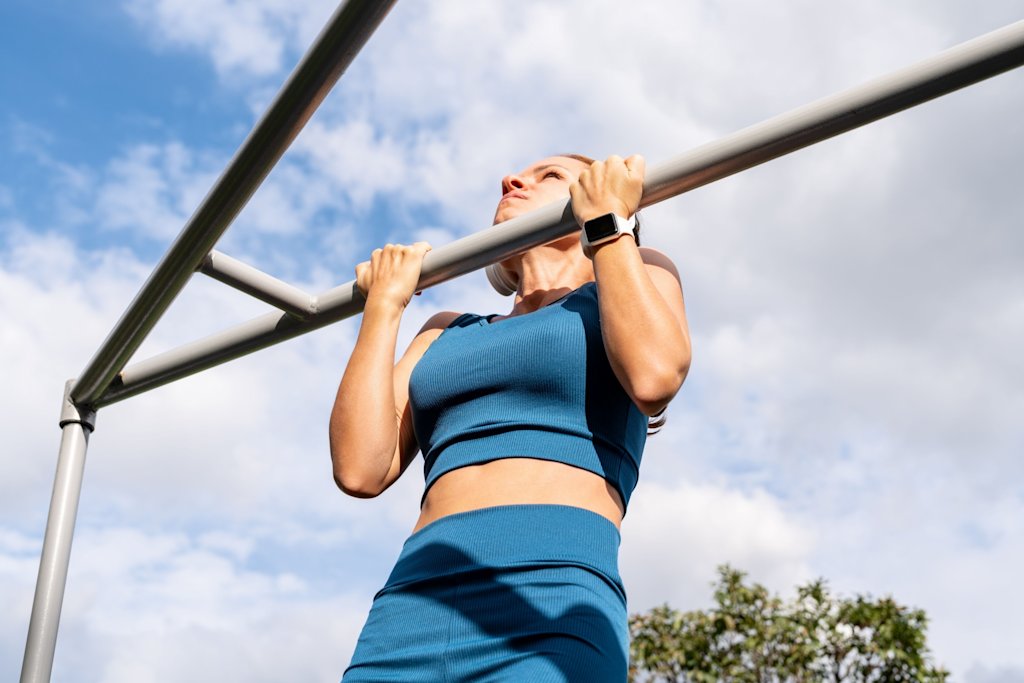
Sure, calisthenics can look like pull-ups and muscle-ups and fancy tricks, but you do NOT need to be able to do a single push-up or pull-up to start calisthenics.
You can start calisthenics training with just some floor space, about 30 minutes, three times a week, and simple movements done with good form. That's it.
Calisthenics is strength training using your own bodyweight: push-ups, squats, lunges, planks, dips and, eventually, movements like pull-ups and muscle-ups. You get stronger by moving to harder versions of each exercise, rather than adding weight to a bar. Below, you'll find the eight best exercises to start with and a simple 4-week plan to put them together.
If your main goal is to build muscle as fast as possible, a gym with weights will definitely get you there faster, because adding load is simpler and more efficient than finding a harder version of a squat. But if you want a way to strength train anywhere, and you love the satisfying feeling of mastering a move you couldn't do a month ago, we LOVE calisthenics. It's also what our Calisthenics Essentials series in the Sweat app is built on!
What is calisthenics?
Calisthenics is a form of strength training that uses your bodyweight and gravity to build muscle, improve coordination, boost endurance and increase mobility. Almost every bodyweight exercise you already know (like squats, push-ups, lunges, crunches) falls under the calisthenics umbrella.
At the beginner end, you're looking at movements that need zero equipment: squats, planks, push-ups. At the more advanced end, you've got things like pull-ups, muscle-ups (a pull-up where you hoist your entire torso above the bar) and handstands.
You can weave a bit of calisthenics into your existing training routine, or make it your entire training focus. The beauty is you can do it at home, at the gym, in a hotel room, or outdoors — wherever works for you.
Callisthenics vs. weight training: what's the difference?
Calisthenics uses your bodyweight as resistance. Weight training uses external load, such as dumbbells, barbells, kettlebells, and machines. Both are brilliant for building strength, and they complement each other really well.
The way you progress is slightly different. With weights, you use progressive overload, meaning you add more weight over time. With calisthenics, you progress by levelling up the exercise itself. Master a regular push-up, then try a decline push-up or a plyo push-up. Master a squat, then try a single-leg pistol squat. It's still progression, just using different strategies, and which one suits you best comes down to your fitness goals, your set-up, and what you actually enjoy doing.

The benefits of calisthenics
There are a lot of reasons people fall in love with calisthenics. Here are the big ones.
You can do it anywhere with zero equipment
No gym membership, no problem. One of the biggest advantages of calisthenics is that you need nothing to get started. It's ideal for working out at home, staying active on holiday, or training when life just won't cooperate with a gym schedule.
And the results are real. A 2017 study published in Isokinetics and Exercise Science found that calisthenics training improved posture, strength and body composition without any major training equipment. If you do want to add a few affordable extras down the track, parallettes, a pull-up bar, or a resistance band can take things to the next level.
It’s great for beginners
Many calisthenics movements are genuinely beginner-friendly and carry a low injury risk. Starting with bodyweight squats and knee push-ups lets you nail your form and build real confidence before progressing to harder variations or adding load. There's no ego lifting here.
It can be low impact
Calisthenics doesn't have to be high intensity. Yes, you can crank things up with explosive, jumping movements if you want to, but you don't have to. Stick to isometric variations (like regular squats instead of jump squats) if you need something kinder on your joints.
It works your whole body
Mix upper and lower body exercises into a session and you've got a great full-body workout. You'll also be calling on your core constantly to maintain balance and technique, which means you're strengthening it even when you're not doing a single crunch.
It helps you move better in daily life
That same 2017 study found that after eight weeks of calisthenics training, participants had measurably improved their posture, strength and body composition. A 2015 study in the Journal of Exercise Physiology Online also found that incorporating calisthenics exercises like push-ups, squats and lunges into school Physical Education classes improved strength in children more than recreational sports alone — recommending bodyweight training as a key part of any well-rounded fitness program at every stage of life.
It builds real strength
Calisthenics builds full-body strength and muscle over time, and as you get stronger, you just make the exercises harder. Add squat pulses, try single-leg or advanced variations, slow down your reps to increase time under tension (hello, muscle shakes), or go faster to build explosive power. The progressions are endless.
It's actually fun
There's something uniquely satisfying about mastering a new movement, especially when that movement is your own body doing something you didn't think it could. Mastering your first unassisted pull-up or doing a pistol squat hits differently than adding another plate to the bar.
The 8 calisthenics exercises beginners should start with
These eight moves cover every major muscle group: two pushes, a pull, a squat, a lunge, a hinge and two core holds. We recommend learning them in this order, but depending on your strength and experience level, do what works best for you. Each one has an easier version so you can start today, and a harder one for when you're ready to level up.
If you're short on space (say, a small apartment with no room for a bar), you can do seven of the eight on a yoga mat. The eighth, the pull-up, needs a bar, but we've also added a no-bar way to start working towards it.
Push-up
Start on your hands and knees, then place your hands on the floor slightly wider than your shoulders, fingers pointing forward. Step your feet back one at a time until your body forms a straight line from your head to your heels (as if you're holding a plank on straight arms). Bend your elbows to lower your chest towards the floor, keeping your elbows at about 45 degrees to your body rather than flared straight out to the sides. Push the floor away to return to the start.
Muscles worked: chest, front of the shoulders, triceps and core.
Form tip: your hips and shoulders should move together, like one solid plank. If your hips sag or lead the way up, switch to an easier version for now.
Not there yet? Start with your hands on a bench, a sturdy table or a kitchen bench (an incline push-up). The higher your hands, the easier it is. You can also do push-ups from your knees, or practice negatives: lower yourself as slowly as you can from the top, then drop to your knees to come back up.
When you're ready for more: lower your hands step by step until you're on the floor, then slow down the lowering phase to three seconds, or add a weighted vest or a backpack with a few books in it.
Bodyweight squat
Stand with your feet about shoulder-width apart and your toes turned out slightly. Push your hips back and bend your knees to lower down, as if you're sitting into a chair that's a little too far behind you. Keep your chest lifted and your weight spread across your whole foot. Go as low as you comfortably can while keeping your heels down, then push through your feet to stand back up.
Muscles worked: quads, glutes, hamstrings and core.
Form tip: let your knees travel in the same direction as your toes. If they cave in towards each other, push them gently out as you stand up.
When you're ready for more: hold a dumbbell or a full water bottle at your chest, slow the lowering phase down, or work towards an assisted pistol squat (one leg, holding onto a door frame) and eventually a full pistol squat.
Alternating forward lunge
Stand tall with your feet hip-width apart. Take a big step forward with your right foot and bend both knees until your back knee hovers just above the floor (both knees at roughly 90 degrees). Keep your front heel on the floor and your torso upright. Push through your front foot to step back to standing, then repeat on the other side.
Muscles worked: quads, glutes, hamstrings and the small stabilising muscles around your hips.
Form tip: if you feel wobbly, step your feet a little wider, as if they're on two train tracks rather than a tightrope.
When you're ready for more: hold a dumbbell in each hand, or try reverse lunges (stepping backwards) and walking lunges for something different.
Glute bridge
Lie on your back with your knees bent, feet flat on the floor about hip-width apart and close enough to your bottom that you can just touch your heels with your fingertips. Press through your heels to lift your hips until your body forms a straight line from your shoulders to your knees. Squeeze your glutes at the top, then lower slowly.
Muscles worked: glutes, hamstrings and lower back.
Form tip: if you feel it mostly in your hamstrings, walk your feet a little closer to your body.
When you're ready for more: progress to a single-leg glute bridge, or rest a dumbbell or weight plate across your hips.
Tricep dip
Sit on the edge of a bench or a sturdy chair with your hands next to your hips, fingers pointing towards your feet. Walk your feet out and slide your bottom off the edge, so your weight is on your hands. Bend your elbows straight back (not out to the sides) to lower your body until your elbows are at about 90 degrees, then press back up.
Muscles worked: triceps, chest and front of the shoulders.
Form tip: keep your back close to the bench and your shoulders down away from your ears. If you feel a pinch at the front of your shoulders, don't go as low.
When you're ready for more: straighten your legs further away from the bench, then try elevating your feet on a second bench. Our tricep exercises guide has more options.
Pull-up
Hang from a bar with your hands slightly wider than your shoulders, palms facing away from you. Pull your shoulder blades down and back, then pull your chest towards the bar until your chin clears it. Lower all the way down with control.
Muscles worked: lats, upper back, biceps, forearms and core.
Form tip: start each rep by pulling your shoulders down away from your ears before you bend your elbows.
Before you try it: most beginners can't do a strict pull-up yet, and that's completely normal. Work through these steps in order, moving on when the current one feels solid:
Dead hang: just hang from the bar. Build up to 30 seconds.
Inverted row: lie under a sturdy table or a low bar, hold the edge and pull your chest up towards it. This is the no-bar way to start.
Negative pull-up: jump or step up so your chin is over the bar, then lower yourself as slowly as you can.
Assisted pull-up: use a resistance band looped over the bar under your knee or feet, or an assisted pull-up machine at the gym.
Pull-up.
Our how to do a pull-up guide breaks this down further, and Pull-Ups Unlocked in the Sweat app is a 12-workout series designed to take you to your first strict pull-up.
Plank
Start on your forearms and knees, with your elbows directly under your shoulders. Step your feet back one at a time so your body forms a straight line from your head to your heels. Brace your core as if you're about to be poked in the stomach, squeeze your glutes and hold.
Muscles worked: deep core muscles, shoulders and glutes.
Form tip: if your lower back starts to ache or your hips drop, that's the end of the set, even if the timer hasn't finished.
When you're ready for more: hold for longer, lift one foot off the floor, or rest a weight plate on your upper back.
Hollow hold
Lie on your back with your arms by your sides. Press your lower back firmly into the floor, then lift your head, shoulders and legs a few centimetres off the floor. Keep your lower back pressed down the whole time and hold. Start with your knees bent and your arms by your sides, which is the easiest version.
Muscles worked: abs and hip flexors.
Form tip: the moment your lower back lifts off the floor, bend your knees or lift your legs higher until you can press it back down.
When you're ready for more: straighten your legs, then reach your arms overhead. The further your arms and legs are from your centre, the harder it gets. To add load, hold a light dumbbell in your hands overhead.
A 4-week calisthenics plan for beginners
Do three full-body workouts a week on non-consecutive days (say Monday, Wednesday and Friday or Tuesday, Thursday and Saturday), alternating between Workout A and Workout B. Each one takes about 30 minutes, plus a five-minute warm-up of marching on the spot, arm circles and a few slow squats.
| Week | Workouts | Sets | Reps | Holds |
|---|---|---|---|---|
| 1 | A, B, A | 2 | 6 to 10 | 15 to 20 sec |
| 2 | B, A, B | 3 | 8 to 12 | 20 to 30 sec |
| 3 | A, B, A | 3 | 10 to 15 | 25 to 40 sec |
| 4 | B, A, retest | 2 | 8 to 12 | 20 to 30 sec |
Workout A: push-up, bodyweight squat, glute bridge, your pull step (inverted row, or your step on the pull-up path if you have a bar), plank.
Workout B: tricep dip, alternating forward lunge, your pull step, push-up, hollow hold.
Rest 45 to 60 seconds between sets. For each exercise, pick the hardest version you can do for at least six reps with good form. Once you can hit the top of the rep range for every set, move to the next version at your next session.
Before your first workout, write down three numbers: how many push-ups you can do (and which version), how long you can hold a plank, and how long you can hang from a bar if you have one. Retest them in your last session of week 4, so you can see exactly what's changed.
Life will get in the way, so here's how to adjust:
Low-energy week, or your period has wiped you out: drop to two sets and stay on your current versions. That still counts.
Only have 20 minutes: do two sets of everything as a circuit.
Missed a session: pick up with the next workout rather than doubling up.
Also, don't expect four weeks of training to get you to your first strict pull-up. That usually takes months, and that's completely normal. When you're ready for more structure, Calisthenics Essentials is an 18-workout series in the Sweat app designed to help you build strong foundations and progress towards advanced moves like pull-ups and pistol squats with confidence. If the pull-up is your big goal, try out Pull-Ups Unlocked series - 12 workouts built to get you there.

Let's bust some calisthenics myths
Calisthenics has a few persistent myths floating around it, so let's clear them up.
"You can't build muscle with bodyweight training"
You absolutely can. Just like any strength training routine, it takes consistent effort to see results, but those results are very real if you consistently challenge yourself.
Harvard Health has pointed to a growing body of research showing that bodyweight exercise builds strength and endurance independently of external load. A small 2016 study confirmed that contracting muscle through a full range of motion without external load increases muscle size comparably to high-load training. Another 2017 study in the Journal of Exercise & Fitness compared push-up training to low-load bench press over eight weeks and found both produced significant increases in muscle thickness, with no significant differences between the two groups.
So yes, bodyweight training can build muscle. The research backs it.
"Calisthenics isn't for women"
We don't know who started this one but it's absurd.
The perception that calisthenics workouts, particularly those that involve movements like pull-ups that demand upper-body strength, is a "men's thing" simply doesn't hold up. A 2016 study published by the National Institutes of Health tracked upper-body strength gains in men and women over 10 weeks of resistance training and found no significant differences in strength gains between sexes. Calisthenics is for everyone.
"There's no way to progress without weights"
Sure, progressive overload can be easier to achieve with access to weights and machines. However, it's not the only way. There are actually loads of ways to make bodyweight training harder without touching a single weight:
Increase your reps or speed
Include equipment like gymnastics rings, bands or pull-up bars. No weights doesn't have to mean no equipment.
Slow your reps right down (3–5 seconds to lower, one second to power up) to increase time under tension
Add pulses for more time under tension (squat pulses, push-up pulses, lunge pulses)
Try more advanced exercise variations (banded pull-up → unassisted pull-up → chest-to-bar → muscle-up)
Add plyometric versions of exercises like jump squats to build explosive power and
Where to start this week
Pick your version of each of the eight exercises, write down your three starting numbers and schedule in three workouts for this week. In four weeks, you'll have done 12 workouts and you'll know exactly what's changed, whether that's five more push-ups, a plank that's 20 seconds longer or your first 30-second dead hang.
Calisthenics works whether you're at home, in the gym or moving between both! If you'd rather have it all programmed for you, with follow-along videos, start the Calisthenics Essentials series in the Sweat app, then move on to Pull-Ups Unlocked when you're ready to chase your first pull-up.
A more empowered you starts with Sweat, and our editorial team is here to bring you the latest fitness tips, trainer recommendations, wellbeing news, nutritional advice, nourishing recipes and free workouts.
* Disclaimer: This blog post is not intended to replace the advice of a medical professional. The above information should not be used to diagnose, treat, or prevent any disease or medical condition. Please consult your doctor before making any changes to your diet, sleep methods, daily activity, or fitness routine. Sweat assumes no responsibility for any personal injury or damage sustained by any recommendations, opinions, or advice given in this article.
Fitness